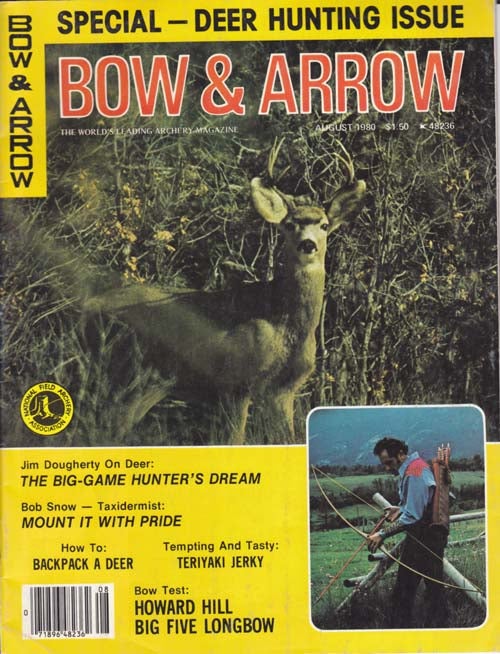
Archive for the 'Gear' Category

0 votes, average: 0.00 out of 50 votes, average: 0.00 out of 50 votes, average: 0.00 out of 50 votes, average: 0.00 out of 50 votes, average: 0.00 out of 5 (0 votes, average: 0.00 out of 5)
You need to be a registered member to rate this post.
Loading...

Published by kr5639 on 21 Apr 2011

ARMGUARD/Gear Pocket with Call Strap by Neet

I have found this armguard has many uses outside of just archery.  I was able to put a tackle box in the pocket and used 2 wine bottle corks by attaching to the call strap and it worked great for fishing.

I bought it from Neet (item N-AGP-1) and it can be found in the new 2011 catalog.

http://www.neet.com/contact.html

1 vote, average: 5.00 out of 51 vote, average: 5.00 out of 51 vote, average: 5.00 out of 51 vote, average: 5.00 out of 51 vote, average: 5.00 out of 5 (1 votes, average: 5.00 out of 5)
You need to be a registered member to rate this post.
Loading...

Published by Double s on 07 Apr 2011

Big Green Field Point Kodiak Target Bag Evaluation

I bought this Target through Gander Mountain’s Website. It is 32″ x 32″ x 14″. The Weight is 50 pounds. It is Made from 100% recycled materials. They state that it will stop 350 fps arrows. Square panels eliminate “pillow” look. It has a Front and rear panel Target dots. It just arrived today. I used a Dolly to move it to my little Shooting range as i do have disabilities. i didn’t want to pull my back out trying to be all manly and trying to drag or carry it. Big green makes these Targets in different sizes. I had the option of buying the smaller Big green Stopper bag which weighs 30 pounds and is 23″ x 23″ x 14″. I purposely wanted a larger File Point Bag for my Back yard range so that I would have more room and spots to shoot at. Plus I can use it for Long range “Sighting in” and being less worried about losing an arrow out into the field. I believe they make two other sizes, Check out www.biggreentargets.com for more information.

From their Website,

“Made from 100% recycled materials. Heat-bonded layered recycled closed-cell foam outer core is filled with recycled fabric and ground recycled foam to create the ultimate “green” target. Delivers super stopping power and easy arrow removal. Square front, back, bottom, and top panels provide maximum target face and will accept shots sitting on the ground unlike most pillow targets. Free standing or hanging use makes them the most flexible bag target available. Targets on front and back. Easy-to-see green targets on white bag. Field-point only”

I took some pics early on after I had set her up. My side yard angles a bit so I placed a piece of wood under the bag to hold her even. I have about 50 shots in the bag. I kept shooting after I took pics. I am using a Rytera Nemesis 28.5 DL at 59 pounds. I’m shooting around 280 FPS with Harvest Time Archery HT-2’s with 100 grain heads
total 360 grains. I took 6 shots with my arrows with NO Lube…..I was having a tough time pulling the arrows out. It’s not a 2 finger arrow pull bag. I took another 6 shots with lube. I didn’t have any of that fancy commercial arrow lube lying around so i used Pam Cooking spray. The arrows pulled much easier and with less force. I didn’t want my hand cramp up from pulling arrows so I used my Flex Pull Arrow puller. It made pulling arrows much better. The Bag comes with a letter from Big Green about target use and maintenance tip.

They state……… ” The outer core of our targets is made from heat bonded layered recycled closed cell foam. Shooting today’s high speed bows and carbon arrows can cause a natural buildup caused by heat and friction of the arrows during long shooting sessions. This is natural with any foam target include those from Block, McKenzie and other manufacturers.”
“Buildup can be substantially reduced by using an arrow lubricant. Common lubricants consist of Dish washing liquid, PAM cooking oil spray, Silicon spray, furniture polish or a commercial arrow lube.”
CAUTION- Because of the unique design, Don’t shoot Broadhead arrows into these targets. You will not be able to remove them. They Do manufacturer Broadheads Targets for BH’s?

1 vote, average: 5.00 out of 51 vote, average: 5.00 out of 51 vote, average: 5.00 out of 51 vote, average: 5.00 out of 51 vote, average: 5.00 out of 5 (1 votes, average: 5.00 out of 5)
You need to be a registered member to rate this post.
Loading...

Published by Double s on 01 Apr 2011

REMINDER: No Selling. This is for Archery, Hunting Blogs & Articles only.

Selling is NOT allowed in the ArcheryTalk Articles and Blogs. For sale or trade items belong only in the ArcheryTalk Classifieds. Posts selling or trading will be deleted. This section is for Articles and Blogs related to Archery and Bow Hunting. Any post not related to Archery or Bow hunting will be considered Spam and trashed and the user deleted. Questions about Bows, Equipment, etc. need to go into the Archerytalk Forum under the correct section. Spammers will be automatically deleted.

1 vote, average: 5.00 out of 51 vote, average: 5.00 out of 51 vote, average: 5.00 out of 51 vote, average: 5.00 out of 51 vote, average: 5.00 out of 5 (1 votes, average: 5.00 out of 5)
You need to be a registered member to rate this post.
Loading...

Published by tibor.max on 21 Mar 2011

Academic project about archery

Well, this semester in the Product Design graduation, me and my colleagues are desenvolving an academic project to re-design an archery accessorie (probably between an Arm-Guard, a Quiver or a FingerTab). In the method we are using we need to apply an open questionnaires to alot of people. So here it goes, if you guys would be kind enought to answer, thanks in advance.


1. Sex

2. Age

3. For how long have you been in to Archery?

4. How did you meet archery?

5. You do it for hobbie, sport or hunting?

6.Which kind of protective gear do you wear?

7. Have you ever suffered any kind of injury while shooting?

8. Could it be prevented by wearing acessories?

9. Between the Quiver, Arm-Guard and Finger tab (or glove), do you have any difficulty with them? Anything you would change or improve?

10. Any observation, suggestion or info you would like to share?


Thanks for the help

0 votes, average: 0.00 out of 50 votes, average: 0.00 out of 50 votes, average: 0.00 out of 50 votes, average: 0.00 out of 50 votes, average: 0.00 out of 5 (0 votes, average: 0.00 out of 5)
You need to be a registered member to rate this post.
Loading...

Published by murphytcb on 13 Feb 2011

How long should my micro adrenaline last

I got a browning micro adrenaline for free, its an 05/06 swill this bow last for a while. I am just getting into bow hunting but want to practice alot before i go into the field and heard good thins about this bow. It is set to 28” draw and 50lbs. it shoots real nice and has a 4 pin tru glo sight . should this last me a while. thanks for the info

0 votes, average: 0.00 out of 50 votes, average: 0.00 out of 50 votes, average: 0.00 out of 50 votes, average: 0.00 out of 50 votes, average: 0.00 out of 5 (0 votes, average: 0.00 out of 5)
You need to be a registered member to rate this post.
Loading...

Published by TikkiMan05 on 12 Feb 2011

Trophy Ridge VS Cobra sights…Pros/Cons

Hey yall,

     I’m looking to purchase a new 5-pin sight and have been looking at the Trophy Ridge Hitman and the Cobra Python. I’m on a limited budget and I’ve been looking around, and so far it looks like I can get either one for around $70. What’s yall’s opinion between the two? Anyone that owns one, how do you like it and have you had any issues with it? Thanks for yall’s help and input.

0 votes, average: 0.00 out of 50 votes, average: 0.00 out of 50 votes, average: 0.00 out of 50 votes, average: 0.00 out of 50 votes, average: 0.00 out of 5 (0 votes, average: 0.00 out of 5)
You need to be a registered member to rate this post.
Loading...

Published by passmaster on 12 Feb 2011

IM READY TO PURCHASE A BOW

I SHOOT WITH FINGERS, IM THINKING OF PURCHASING A HOYT VANTAGE PRO BUT IM NOT SURE WHICH CAM TO USE WITH THIS BOW WHAT DO YOU RECCOMEND

I HAVE A 27IN DRAW

0 votes, average: 0.00 out of 50 votes, average: 0.00 out of 50 votes, average: 0.00 out of 50 votes, average: 0.00 out of 50 votes, average: 0.00 out of 5 (0 votes, average: 0.00 out of 5)
You need to be a registered member to rate this post.
Loading...

Published by archerchick on 10 Feb 2011

Music To Crest By~By Tharran E. Gaines


Bow And Arrow
August 1972

Music To Crest By~By Tharran E. Gaines
An Old Phonograph Can Improve The Appearance Of Your Arrows As Well As Make Cresting Easier!

MANY SERIOUS ARCHERS eventually get the urge
t0 build their own equipment, especially arrows. And to
personalize and give those new arrows you so proudly built
a custom-made look, you will agree that a crestor can be an
invaluable tool.

But if you are in the same situation as I was and wonder
whether you make enough arrows a year to justify spending
between twelve and thirty dollars for a crestor, you may
want to build your own. That’s what I did, using a few
pieces of wood and the parts from an old record player.
Price will probably not exceed four or five dollars, depending
upon how much the record player costs you.

I wanted a motor that I could use permanently and one
that would be cheap and easy to obtain. I finally settled on
the motor from an old record player and eventually got it
to work for my purposes.

Although I don’t guarantee that all record players will
work, you probably will be able to find one that will if you
look for two things. One is to try to find a record player on
which the turntable shaft tums also and not just the turntable.
Nearly all of the single speed or 45 rpm players that I
have seen have a shaft that turns, but many of the stereo
units have a solid center shaft that employs a record
changer. Second, if it is possible to see the underside of the
record player, try to use one that has a rubber drive wheel
attached to the motor. Most record players use a drive
wheel which is connected to the motor and also runs
against the side of the turntable to operate it. If the drive
wheel isn’t attached to the motor it will still work but
perhaps not as well.

A center shaft of the turntable that turns 0n bearings
will be easier to work with, but a shaft that just runs
through a bushing will also work. Because I used the shaft
and the bearings as part of the crestor it is important that
they will turn.

Because old phonographs aren’t much good unless they
play, you can usually get one for next to nothing. I built
one crestor from an old phonograph that a repairman gave
me. It is also possible to pick one up at a garage sale or a
pawn shop pretty reasonably priced. Just be sure that the
motor works and that it still has the turntable and shaft.
About the only tools required for taking the machine
apart (after you`ve unplugged it) are a pair of pliers, a
screwdriver and a set of Allen wrenches to remove some of
the pieces attached with this type of bolt. When the motor
and most of the scrap pieces of metal has been taken off,
next remove the bushing or bearings through which the
turntable runs. In one type that I used, the bearings were
on a solid piece that simply unbolted from the frame, but I
did need to trim off some excess metal arms with a hack
saw. On another type. it was necessary to cut a square piece
out of the chassis frame to which the bushing was attached.
Additional materials for the crestor will include a one
inch piece of lumber about six by twenty-six inches for a
base, two pieces one inch thick by six by seven inches and a
few small blocks about one inch cube. For these pieces I

used a piece of one by six pine board and just cut off the
different length pieces. Plywood that doesn’t split easily
also will work fine. The length of the base can vary, but
twenty-six inches gives good support for the arrow while it
spins. I also used the crestor occasionally for sanding on the
points, and the long length allows for a support near the tip
of the arrow.

You also will need a small sheet of one-eighth or one-
quarter-inch plywood or masonite that can be cut into two
pieces about six by seven inches and one six by six inch
piece, and something to use as a chuck, I used a cylinder-
type chuck with a rubber washer in the center to hold the
nock, but you could also use a piece of surgical rubber
tubing.

The chuck I used was obtained from an archery catalog
for $1.50. All of the record player shafts that I have found
have had a diameter of 9/32, and I was able to buy the
cylinder chuck in this size.

Next, drill a hole in one of the six by seven inch pieces
of pine or plywood for the shaft to fit through. It should be
located about two inches up from the bottom when the
piece is placed on end on the base.

If the plate containing the bushing does not already have
screw holes for attaching it to the board, drill four or more
holes so it can be mounted on the back of the board. Next,
place the shaft from the turntable through the bushing. In
some cases the shaft will already be mounted in the bearings.
In this case just mount the bearings on the board and
cut the shaft off to the correct length. I discovered on some
45 rpm players the center shaft may be too short. I found a
piece of broken arrow tubing, which is close to a size 1716
aluminum, can be cut to the right length and used as a shaft
through the bushing. It is important that the shaft spin
smoothly in the bushing. If it doesn’t, polish the shaft with
emery cloth or steel wool until it runs smoothly. Thin oil
might also help. The motor will later be mounted on the
board so that the rubber drive wheel will spin the shaft.
Next, you will have to find some way to keep the shaft
from slipping back and forth in the bushing. Using the
cresting chuck on the front of the shaft kept it from slip-
ping forward.

I put two washers on the back of the shaft and behind
this I made a small roll of friction tape about Eve-eighths
inch in diameter. This not only keeps the shaft in place but
it acts as a drive wheel for the crestor shaft to which the
motor’s drive wheel grips, thus spinning the shaft. If you
need to have the shaft longer you can put a spacer made
from a piece of arrow shaft between the washer and the
tape. Rubber tubing or rubber washers probably would
work even better than the tape.

By varying the size of the drive wheel on the crestor
shaft you can also vary the speed that the arrow will spin. A
smaller wheel on the shaft will cause the chuck to spin
faster. One advantage of using the tape is that you can build
up the size of the crestor drive wheel.

On the type of shaft that I used that was already
mounted in bearings there happened to be a gear on the
shaft for a record changer. Taking advantage of this, I
simply used this as a drive wheel on the shaft and ran the
drive wheel of the motor against it.

Next, determine how the motor should set above the
crestor or turntable shaft so that both wheels will come in
contact with each other. Then glue blocks on the back of
the board to build the motor up to the level where the two
wheels will match. I used block out from the leftover pine
board and finished building it up to the correct height with
thin pieces of balsa wood. Then I fastened the motor to the
blocks with screws, in a position so that the two drive
wheels would have enough contact with each other to run
well but not stop the motor.

If the motor doesn’t have a rubber drive wheel, just
mount it so that the motor`s bare metal shaft has contact
with the drive wheel you have made on the crestor shaft.
However. it will tend to slip more and the shaft will turn in
a counterclockwise direction. I also experimented with
putting a chuck directly on the motor shaft, but this tends
to spin much too fast and causes vibration on the spinning
arrow shaft.

Now you can mount the board, to which the motor has
been attached, on the base vertically and about six inches
from one end. I attached the other six by seven inch board
on the end of the base to form a back for the motor, and
used the pieces of masonite to close in the motor compartment
on the top and sides. The two side pieces were six by
seven and the top piece was six inches square.

The motor compartment can be squeezed in even more,
depending upon the size of the motor. Use small nails when
putting on the sides, in case you need to adjust the way the
motor sets later. It isn’t necessary to close in the motor, but
I thought it looked better. It also helps to brace the upright
board on which the motor and shaft are mounted.

If you are not too proud of your carpentry work, you
can cover the motor compartment with contact paper. A
coat of stain or varnish will also bring out the grain in the
wood.

To finish the crestor, I cut a V-shaped notch in two
blocks of balsa wood and mounted these on the base for
the arrow to spin on. Between these I attached a piece of
balsa about eight inches long. This is to attach a card on
which you have drawn your crest design.

I used balsa wood only because it is soft and I can attach
the card with pins. A piece of plastic probably would be
better for the V-notches.

When painting the crest you will be able to slow the
arrow down or make it run smoother by putting pressure
on the spinning shaft into the notching in the blocks. After
a while you will find that the only limit to the designs of
crests that are possible is your imagination and perhaps
your paint supply.

You may choose to vary the plans in many ways and
may have to. You will no doubt find that not all record
players will work as well or like the ones I used, but with a
similar plan you may soon be painting your own pin stripes.
<—<<<<

Archived By
www.Archerytalk.com
All Rights Reserved

0 votes, average: 0.00 out of 50 votes, average: 0.00 out of 50 votes, average: 0.00 out of 50 votes, average: 0.00 out of 50 votes, average: 0.00 out of 5 (0 votes, average: 0.00 out of 5)
You need to be a registered member to rate this post.
Loading...

Published by Mathews_ArchZ7 on 10 Feb 2011

Its about that time again…

What does everyone have for a set up…. Spring Gobbler season is fast approaching us.

Im not even using a shotgun this year, I think im gonna take my Mathews Z7 for a spin and see how it goes.

So let me know what everyone is using for a set up.

– Mathews Z7 with Easton FMJ 400 and the American Broadhead Company Turkey Tearror

0 votes, average: 0.00 out of 50 votes, average: 0.00 out of 50 votes, average: 0.00 out of 50 votes, average: 0.00 out of 50 votes, average: 0.00 out of 5 (0 votes, average: 0.00 out of 5)
You need to be a registered member to rate this post.
Loading...

Published by archerchick on 10 Jan 2011

Howard Hill Big Five Longbow~Bow Test ~Sam Fadala


BOW & ARROW
August 1980

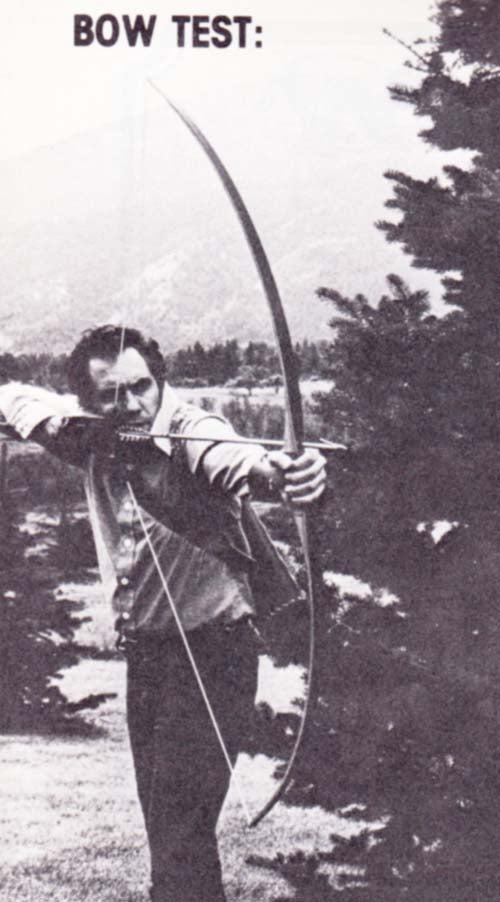
Howard Hill Big Five Longbow – Bow Test

HOWARD HILL was a legend long before his passing in
February of l975. He was the man who started my
generation shooting the bow and arrow. And we all began
with some form of the longbow, however humble the particular model happened to be.

We young enthusiasts sometimes had the great good luck
of catching Mr. Hill in one of his short films. For a quarter,
our parents could get rid of us for about a half-day at the
movies, with a cartoon, sometimes two, a main feature and
a serial calculated to keep us in suspense and to return next
Saturday to see how Flash Gordon made out against the
evil forces of Space.

In between the feature and serial, we often had a “select-
ed short subject.” Sometimes they were dull, and l suspect
that an educator in the community was bribing or threatening
the theater manager to slip these in. But one afternoon,
the short was anything but dull. It was Howard Hill himself,
doing things with a bow that didn’t seem possible to us.

The gang was already into some form of archery, but it
was Hill who drew us away from the horrible mismated
archery tackle to balanced tools. My first bow, in fact, was
an oleander limb whacked off of my grandfather’s hedge, a
stretch of packing twine for a string and milkweed reeds for
arrows. Self-bows were next. They were often lemonweed,
and not all that bad, but too thin of core and too flat of
limb. They only cost a few bucks to buy and arrows for
them were twenty-five cents. Mine drew around twenty-five
pounds. I still have it.

The yew bow was a romantic and suitable model. But
back in these carefree days of the twenty-five-cent movie
in the l950s when this writer was a ripe IO years old we
began to tune in on the Hill archery song the handsome bows
with matched equipment to go with them, longbows. By
way of definition, these bows were indeed long, certainly
sixty inches and more often sixty-six inches and more, and
they were thick of core and narrow of limb with graceful
tips to nock the string.

The Howard Hill Company of Hamilton, Montana, is and
has been offering a replica, as it were, of the Hill-style bow,
and the particular model which crossed my hands for a test
run was their top-of-the-line Big Five model. The Big Five,
according to the literature and information given me by Mrs.
Betty Ekin, friend of Howard Hill and, along with son Craig,
operator of the Howard Hill Archery Company, was patterned
after the famous “Sweetheart” bow of Hill’s.
This top-of-the-line model is the one I preferred to test,
as I try to do with all companies’ bows. The construction of
the bow is per Hill’s design. That is, the core is bamboo.
Anyone who looks into the older books referring to Hill’s
bows will recall that Howard preferred bamboo for his limb
laminations. The current Hill Company has followed suit
and is still using the particular bamboo which Hill deter-
mined was best. Those of you who may, perhaps, flyfish,
may be familiar with the “temper” and action of the more
expensive “split bamboo” flyrods. The same criteria of
action and resiliency which make a flyrod “alive” also make
the longbow feel alive in the hand.

The specific type of bamboo, of course, is important as
all bamboo is not created equal. Hill reportedly took a trip
to Japan in 1960 in order to find and ship home a specific
species of bamboo he found most suitable for his needs, and
I am told that the Hill Company still uses this species in the
bow’s construction to date.

Obviously we are speaking of the heart of the bow when
we talk bamboo. This heat-treated bamboo, which of course
has been split into thin lengths, is then laminated together
to form the thick, but narrow core of the true longbow type.
As a simple matter of rule, I noticed that the Hill’s bows rank
according to number of laminations, the top of top-of-the-line
Big Five having four strips of bamboo, the Tembo with three
and the Half Breed with two. I cannot say that the bows with
only two laminations or three, are not fine-shooters too, because
my previous tests show that they are; however, the price being
reasonable anyway, the Big Five is surely one to look at as
a bargain.

The Belly and face of the bow are both backed by glass on the
Big Five, in this case, Bow-tuff, a brand with which we are all
familiar. The riser is Bubbinga hardwood, another material we all
know well. Though not an elaborately beautiful wood, Bubinga is
a sturdy and entirely suitable in the longbow. The traditional longbow
riser is going to sport a handle of tanned leather anyway, covering
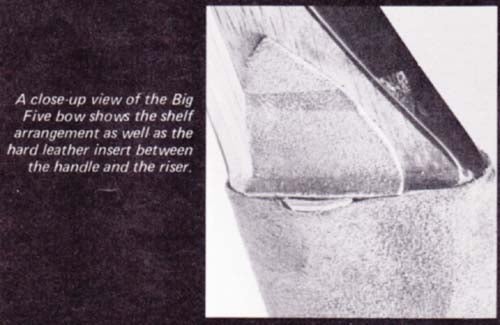
most of the wood. The shelf of the bow consists of a small hunk of
very hard tanned hide which is tucked underneath the leather handle.
Another piece of hide is used against the side of the handle
where the arrow would make contact.

Shooting off the shelf is, of course, standard practice
with the longbow, and it sometimes bothers those who have
not tried this type of bow. It should not. Shooting off the
shelf works fine. If a very special arrow rest were attached to
the bow, there is no doubt that a few foot-seconds of speed
would be picked up, but shooting from the shelf offers fine
control and very easy handling of the shaft from nocking to
controling during the holding of the bow at fulldraw. l prefer
to shoot off the shelf with a longbow and will not attach
a rest to one.

The nocking ends of the bow are traditionally pointed and
very lean. And, contrary to the way things might look,a long-
bow tends to remain strung admirably well. l have never in
my life had one become unstrung in the act of shooting, in
fact, and I have shot a good many longbows. There is an enforcer
strip of glass laminations on both ends of the Big Five.
This is a sandwiched piece of glass that tapers thin.

The final finish of the bow is excellent with the exception
of a couple places where it looks as though there was an
epoxy run, or lumping of final liquid finisher. The widest `
part of the limb is about 1 1/4 inches. That will i seem slim to
anyone used to the limbs on a compound, and it is also
quite narrow as compared with the recurves of the Fifties
and Sixties that were sold primarily over the counter. It is a
matter of what fits where, and the narrow limb on the long-
bow is a plus factor, The core, that is the thickness of the
bow as viewed from the side upward from the riser and down
from the riser, is thick, in this case about seven-sixteenths-
inch at the widest measure.

The particular longbow that I elected to test turned out
to be a draw weight of sixty-four pounds thrust at twenty-
seven inches pull. I would have preferred a seventy-pound
draw at twenty-eight inches; however, I did overdraw the
bow by one inch in the test so that I ended up with a force
of sixty-seven pounds. This was close enough, as I do like to
keep all my test bows within a range of about seventy pounds
pull. Overdrawing is not the best practice in the world, by
the way, but for the few shots I had to fire over the chronograph
screens, plus less than fifty darts tossed at the targets,
the bow was not in any sense harmed.

All in all, those are the physical characteristics of the
Howard Hill Company’s Big Five longbow. However, the
reader may be curious about the name itself. As already
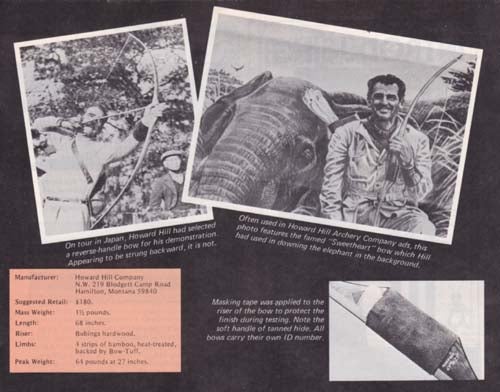
stated, the Big Five is a direct copy of the old Sweetheart
bow of Hill’s, and it was that bow which went on the famous
safari after the “big five” of Africa. Hill took three elephants
on that trip, I am told, firing four arrows for all three
from his 115—pound bow. Back in the Fifties, when the feat
was fresh, wild stories flew all around the archery world that
Hill had used a 150-pound bow and so forth, but it was the
II5-pound model that did the trick, firing special forty-one-
inch arrows.

Hill’s bows were set up for a twenty—eight-inch draw, I do
believe, and that has been considered a standard for many
years. While Hill was not a weight lifter, he was a powerful
man who had a good set of arms on him, However, he apparently
credited his ability to totally master the eighty,
ninety and one hundred-plus-pound bows to building up to
them. Naturally, a whole different set of muscles apply to
drawing the bow, and I have seen many a strong man shudder
and shake trying to draw a bow of far less than eighty
pounds pull.

Hill did not advocate going to heavy bows that were not
manageable by their owners. Of course this is correct, but
we should not misconstrue the statement as some have. Hill
was not in favor of sticking with a light bow just because it
could be easily mastered. He elected for the heaviest bow a
person could shoot with comfort. That means, he wanted us
to build into our bows, finding a place where we could
master a given poundage.

In shooting the longbow, it is difficult to explain how
to aim one. I have never had any luck trying to tell some-
one how to hit a target with a longbow, although Hill at-
tempted to teach a split-image design of aiming. I am not
certain that is what he called it, but the term seems to be
correct. Simply, a longbow is fired-pretty much the way
we toss a rock. A rock has no sights. And yet I’d bet that
no one reading this would have any trouble coming pretty
close to a tin can at ten feet, thirty feet, twenty yards;
even much farther. And·we have darn little practice at
rock throwing, too.

Since there are no sights on the longbow (although
there certainly have been sights on some longbow models
out of the past) it is best to grab up the bow, nestle the
hand comfortably into the leather grip without choking
the grip down, and then moving the bow around a bit to
get the feel of it. Remember, the entire mass weight of the
Big Five is only one pound and six or so ounces.

The bow can be held without undue strain in the bow-
hand, by the way, as the handle wedges back into the palm
just as with any other bow type, and this is the best way
to shoot, without choking down on the grip. The same
anchor point the archer uses for his compound may not
be fitting for longbow shooting, although I find no problem
using the same point. The left arm is somewhat crook-
ed in drawing the longbow and the archer leans into his
work, rather than standing straight up. The bow is usually
canted, or tilted off to one side, which not only aids
in maintaining the arrow balanced on the shelf, but also
allows for the head to be bent a little, too. The bending
of the head puts the eyes in line with the shaft and the
target.

All I can say is that something unconscious soon takes
over and the archer is popping arrows into the target butt.
I like to think l keep my eyes on the target and not the
tip of the arrow, but I am told by smarter men than l
that the eye does dart back and forth from target to
arrow tip. I am not going to consciously try to discover
whether it does or not. `

The fistmele on this bow will be terribly small by the
standards of the old recurves and the modern compounds.
In fact, shooters may have trouble with this, sometimes
turning the riser so that the string snaps into the arm.
Naturally, it is wise to use an arm guard But the shooter
should not try to make the fistmele dimension wider. It
will normally slow the bow down and decrease the cast
and sometimes upset the arc of the arrow. The fistmele
is properly short, and on my test model it was only 5 3/4
inches from the back of the riser to the string.
The riser is standard on the Big Five. That is, it points
inward to the hand as per normal/average. However, Hill
did use some models which were reverse handle. I have
such a bow and I am forever asked “Why did you string
your bow backwards?” It is not strung backwards. The
handle is fitted that way to offer a different type of grasp
for the hand.

In stringing the Big Five, I used my stringer. That
makes sense to me. I never did care for the step-through
method, because even with a stable-limbed longbow, a
twisted limb is still a possibility. There is also the push-
away method, and that works all right. I may not have
developed the particular muscles necessary to master
the latter, and with my own seventy-pound longbow, I
have a hard time stringing it with the push-away, so I
have gone to the stringer. Sissy, maybe, but it works.

Hill Company has suggested the stringer too, incidentally.
As for arrows, the plain old cedar shaft is still mighty
good in the longbow, but I have successfully fired all
types of materials. The quick recovery of the cedar shaft
is hard to beat. Remember, the arrow has to, in fact,
dart around the riser of the bow and then spring back
into the line of arc. Therefore, the resilient cedar shaft
is a good one. I was surprised to see the true all·graphite
shaft work well, too. The shaft was a Lamiglas, which
is not part graphite, but all graphite.

Only these two arrows were used for shooting, as I had a
dozen of each around. The cedars were trimmed to twenty-
eight inches from the inset of the nock to the very tip of the
arrow and then the arrow was drawn back until the tip rest-
ed full on the shelf.

As for the Lamiglas arrows, they were left full length as
they are so very light anyway, and contrary to what we might
think, the longer pure graphite arrow is stronger than a short-
er pure graphite arrow. At least, this is what I am told by an
engineer who is in the business. Therefore, I have left my
graphite arrows at a full thirty-one-inch draw. With my favorite
compound I have trained myself away from the long 31 1/4 inch
draw I used to have, down to a more useful twenty-nine-inch draw.
I like a twenty-eight-inch draw in the longbow. We sometimes get
carried away with getting our equipment tuned and forget that we
can tune ourselves, too. Our bodies bend. And we can change a
draw length to some degree. It is no trouble to relax into the longbow,
lean into it, bend the elbow and enjoy a nice twenty-eight-inch draw
and the resulting lighter stiffer arrow.

The cedar arrow attained a velocity or 176 feet per second (fps).
This arrow, however, was a shade overweight for
the bow, being an Acme premium cedar in 70/75-pound
spine. l might have gotten the bow to stabilize well with a
65/70 spine, or even a 60/65 for a target arrow, though the
latter would probably be overcome by a heavy hunting head.
The Acme 70/75 weighed 497.5 grains.The stiff and ultra·light
pure graphite Lamiglas shaft
earned a starting velocity of 192 fps, this arrow weighing
only 434.2 grains. The stiffness and lightness seemed excel-
lent out of this bow, however, and it is a tribute to a good
arrow.

The nocking point was set on the bow by testing, not by
measuring first and then arbitrarily setting it, l simply put
the nocking point so that the arrow was perfectly horizontal
to start with and I moved the nock up on the string just a
little at a time until l was rewarded with a stabilized flight
out to forty yards and beyond. The greatest shooting I did
with the bow was at forty yards.

The arrows were, as per necessity, feather fletched. A
plastic vane will hit the shelf and toss the arrow askew. The
feathers simply fold back on the shelf and allow the arrow
to continue on its path. Unlike the testing of a compound,
the bow was shot “out of the box.” In other words, tuning
was not questioned. The longbow can be tuned, of course, by
changing the weight of the string, or by switching string
length to change fistmele. In short, by manipulating the
variables one at a time and checking arrow flight. Arrow
swapping is in itself bow tuning. But that is another story.

A glove was used, not a release of any kind. That’s nothing
new for me as l use a glove for all my testing, feeling that I
want to know the performance of the bow in the hunting
field as I would use it there. The glove will indeed slow down
the arrow to a small degree, however, and in all fairness this
should be pointed out. I have, in some compounds, picked
up several feet per second by going to a release, but usually,
in an overall contest, a smooth good glove won’t be that far
behind the velocity delivered by a release mechanism.

The newcomer to the longbow, especially the compound
shooter, should relax and enjoy this addition to his sport.
I call it an addition because I shoot both compounds and
longbows. And he should not go too heavy in draw weight.
It’s unnecessary for the most part when targets and deer-
sized game is going to be the main use of the bow. A fifty-
pound longbow will give a lot of pleasure, and when the
shooter builds up to it, a sixty or seventy will do a great
deal of work. If an archer is dedicated enough to spend
time in the back yard, he can build up to a lot of weight
and handle it well. Men of slight build can do it. I have a
shooting acquaintance who is small of stature, yet he fires
an eighty-six-pound longbow with ease and control. Unfortunately,
this peak can be lost if practice is forsaken. You’ve
got to keep in shape.

At the beginning of Winter, l am pretty strong with my
own seventy-pound longbow. By the beginning of Spring,
when Winter has denied me much shooting time, I’m pretty
bad. l should have an identical longbow to my seventy-
pound model that draws about forty-five or fifty to build
up with for the start of the new season each year, or move
to a civilized locale where shooting all year long is possible.

The Howard Hill Company Big Five bow sells, as this is
written, for $l79.95 plus F.E.T. (Federal Excise Tax) and
shipping. A letter to the company at N.W. 219 Blodgett
Camp Road, Hamilton, Montana 59840, will bring a price
list, plus a little catalog of the Howard Hill Company’s bows
and products, as well as some interesting information on
Hill himself. The company also sells arrows, gloves, arm-
guards, strings and other supplies to accompany the bow, all
in the traditional Hill format. And they also offer a few
books to help the archer, such as The Complete Archery
Book by Hochman and Longbow by Hardy.

The longbow, unlike the over-the-counter recurve, has
continued with a rather large following. It’s history is an
extremely interesting one, and a very long one, with no end
in sight, which is the way we would hope to have it. It is
good that an archer can select from different bow styles,
compounds, recurves and longbows, giving him that much
more scope to make his sport that much more interesting.

– Sam Fadala

ARCHIVED BY
www.ARCHERYTALK.com
All Rights Reserved

Bad Behavior has blocked 308 access attempts in the last 7 days.